
Hidden Springs Homestead may earn a commission for purchases made after clicking links on this page. Learn More.
Use this easy-to-follow guide to walk through step by step to learn how to plant and grow potatoes in your own home vegetable garden. You’ll be so pleased with how simple they are to grow.
They require very little care, and it’s always a surprise when harvest season comes since everything grows underground.
Even though they are simple to raise, you can always do a few things to increase your crop.
And even though potatoes are pretty cheap to buy, the taste of homegrown potatoes far exceeds the taste of store-bought.
Spring temperatures are perfect for planting early spring vegetables, and potatoes love the cool temperatures.
So, today we’ll talk about planting and growing potatoes as well as everything you need to know about planting, harvesting, and storing.
Imagine an unending supply of fresh potatoes stored in the root cellar or basement to eat during the cold winter months.
I remember when I was a little girl, my granny would always send me down into the root cellar to bring up potatoes she would cook for supper.
The cellar was underground, had a dirt floor, and walls were made of stacked rock, and potatoes would be laid out all over the floor on cardboard.
Today, at our house, potatoes are a staple too. Since you can prepare them in so many ways, we never get tired of them.
Dishes like potato soup, stewed potatoes, garlic mashed potatoes, baked, loaded, hash browns, fried, and even wedges. I could just go on and on. But let’s learn how to plant, grow, harvest, and even store potatoes for your family.
About Potatoes
The potato is part of the nightshade family that is believed to be native to the Americas. It’s well known for being a starchy food. It’s a tuber that grows completely underground, hence the surprise at harvest time.
Though many of us know only about the white potato found in the supermarket, over 200 varieties of potatoes fit into seven types: Russet (most common), Red, White, Yellow, Blue/Purple, Fingerling, and Petite.
Potatoes are known for being a starchy vegetable with about 100 calories per potato. But though this may turn some off with the high starch count, you also get about 30% of a daily Vitamin C and about 15% of the recommended potassium. Potatoes are also gluten-free and fat-free.
All this said they are known to be the #1 vegetable consumed. With the tomato in a close second.
RELATED: Even if you’ve never gardened before, this Vegetable Gardening for Beginners Ultimate Guide is for you! Learn everything you need to know from over 60 resources, all in one place, to be a successful gardener, including improving soil, cover crops, warm and cool season crops, organic amendments, fertilizing, watering, and so much more.
Three Categories of Potatoes
As mentioned, there are over 200 different varieties of potatoes sold throughout the United States, and the seven types fall into three basic categories. These categories are what affect the outcome of your recipes.
Starchy:
This potato is great for frying, baking, boiling, and mashing. Since they are so high in starch, they don’t hold their shape well. The classic Russet or Idaho potato are two of the most common potatoes in this category.
Other starchy potato types are the Jewel Yam, Hanna Sweet, and Japanese Sweet, but there are others.
Waxy:
A couple of examples of waxy potatoes are the Red Potato, New Potato, and Yukon Gold Potato.
Waxy potatoes are great for frying as well as in stews, soups, potato salad, and even scalloped. They are smooth and hold their shape well when cooked.
The Red Thumb, French Fingerling, LeRette, Rose Finn Apple, and Russian Banana are more waxy potatoes. Many more exist, but you get the idea.
All-purpose Potatoes
These potatoes have less starch in them and hold their shape well when cooked.
A great example of an all-purpose potato is the Red Gold. This little red potato is often found in the grocery store.
They are best served baked or roasted, put into salads, grilled, and steamed.
A few more all-purpose potatoes are the Purple Majesty, Norland Red, and the Kennebec (which is what I grow in my garden).
3 Secrets for Planting
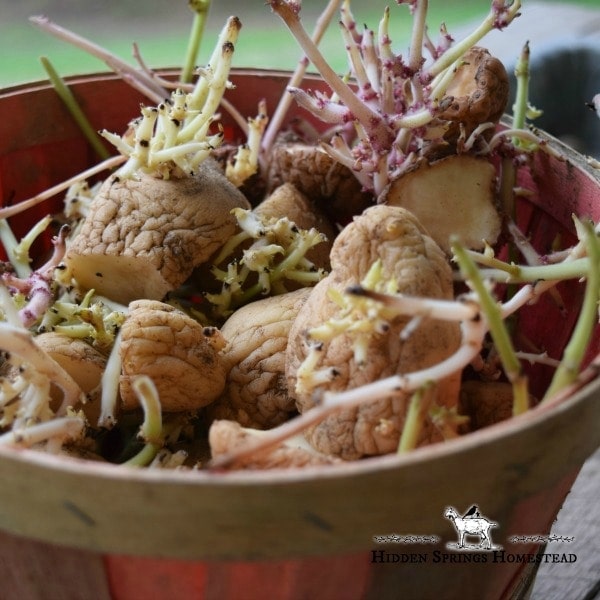
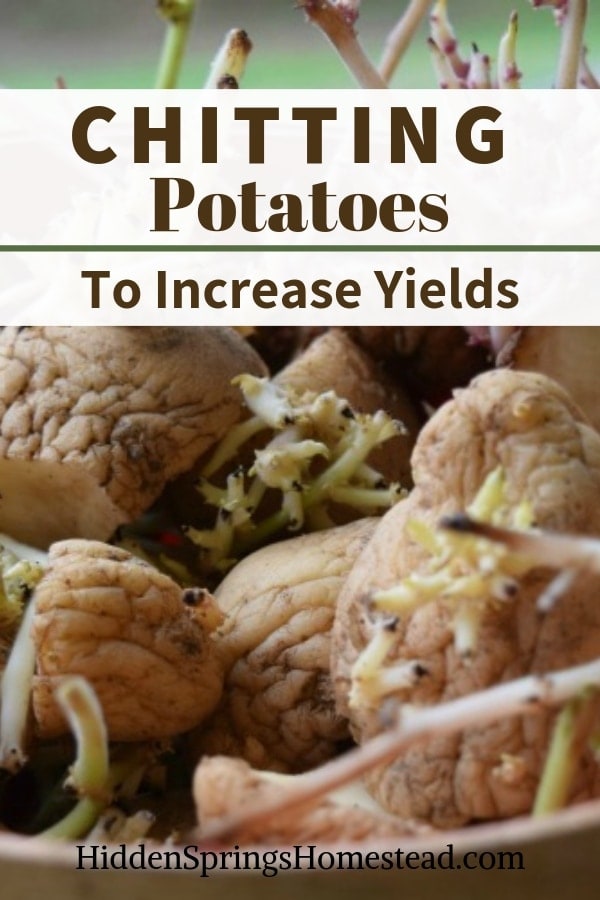
1) They Should be Chitted
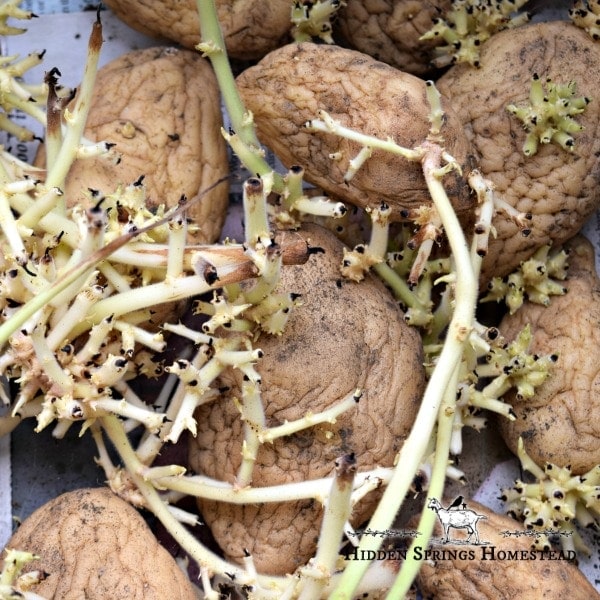
To grow potatoes, you need to plant them from what is known as “seed potatoes.” Though the term can be a bit misleading because potatoes do not grow seeds, you have to plant an actual piece of potato that has sprouted with what is known as “eyes.”
The potato must be non-GMO (so they will reproduce themselves) and haven’t been treated with a non-growth enzyme. This article, Reading and Understanding Seed Packets, discussed non-GMO in depth.
Some refer to it as “planting potatoes with long sprouts.” Either way, you wish to call it, potatoes need eyes or sprouts to be planted and grow.
The awesome thing about seed potatoes is once you buy them, you can save them from year to year and never have to buy them again!
This makes growing potatoes even better; You don’t have to spend over and over to buy seeds. So it is a great way to save frugally on the homestead.
RELATED: Take the guesswork out! Use the easy formula worksheets in The Canning Garden Workbook (printable) to figure out how much to plant, for canning, to feed your family for a full year!
2) Cut the Eyes
I cut the potato into pieces to prep them for planting. Each piece should have 1-3 sprouted eyes on it. You can plant whole potatoes as well, but a rule of thumb is:
- More eyes per piece = more potatoes but smaller
- One to two eyes per piece = fewer potatoes but larger
So you’ll need to decide whether you would like larger or smaller potatoes. I cut mine to have 2-3 chits or eyes on each potato piece.
3) Dry Curing Before Planting
If you cut them into pieces, they must be laid out in a dry area that is consistently over 70°F (21°C) for 3-5 days before planting. This allows the fresh cuts to “heal over” or callous and seal themselves with a protective cover to prevent rot and disease once the potato is in the ground.
The cut will turn black, and this is OK. It is the starch being exposed to air and will not harm the way it grows.
Potatoes that are smaller than a hen’s egg shouldn’t be cut. You should plant this whole.

When to Plant Potatoes
Potatoes can be planted in early spring after the soil temperatures reach 45°- 50°F ( 7°-10°C) degrees in the daytime or 3-4 weeks before the average last frost date. The potato seed may not sprout and rot in the ground any cooler than this.
Pay more attention to the soil temperature rather than the frost date. You don’t want them rotting in the ground.
Soil should not be so wet that it sticks together. It should be light and fluffy with a good structure. If the soil temperatures a right, but the soil is too damp, it’s best to wait until it dries out some more.
Tips for Growing Large Potatoes
- Potatoes prefer slightly acidic soil with a pH of 5.6- 7.0.
- The potato plants will need to be planted in full sun – at least 6-7 hours daily.
- For best results, keep the potato patch free of weeds so plants can take in all the nutrients in the soil and not compete with weeds.
- The plants can also tolerate frost, but if you are expecting a late-season freeze, cover your plants if they have sprouted out of the soil.
Planting Potatoes
I grow potatoes in rows in raised beds. There are several different methods to plant potatoes, such as 5-gallon buckets, bags, or containers, digging holes in the soil, and even in straw bales.
But today will talk precisely about planting directly in rich garden soil using a v-shaped trench.
Step-by-Step Planting Potatoes
How do you plant potatoes?
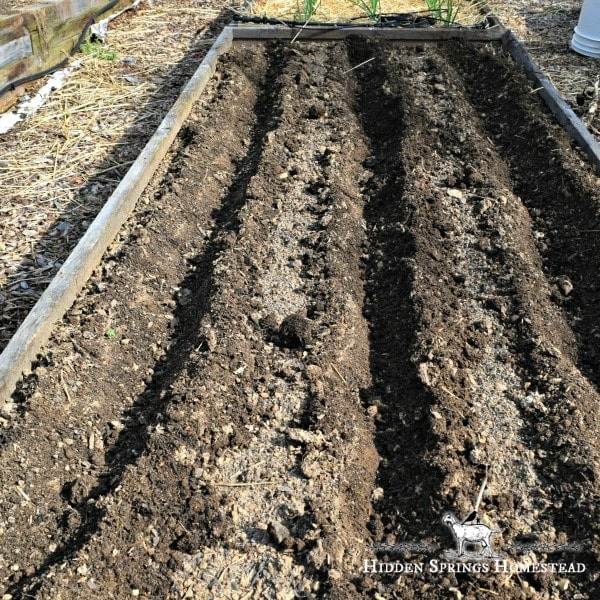
1. First, begin by laying off straight rows in the soil that are 5-6 inches deep, spacing each row 12 inches apart.
To make the most of the space you have, before you begin, create a garden map to maximize your space – rotation, spacing, and more!
2. Inside each row, fill with a nice layer of rich compost manure about 1 inch deep, then add a low nitrogen, high phosphorus fertilizer. I buy and use Down to Earth Fish Bone Meal in a 50lb bag. It’s a 4-12-0 OMRI-approved fertilizer, and I have had good results with it.
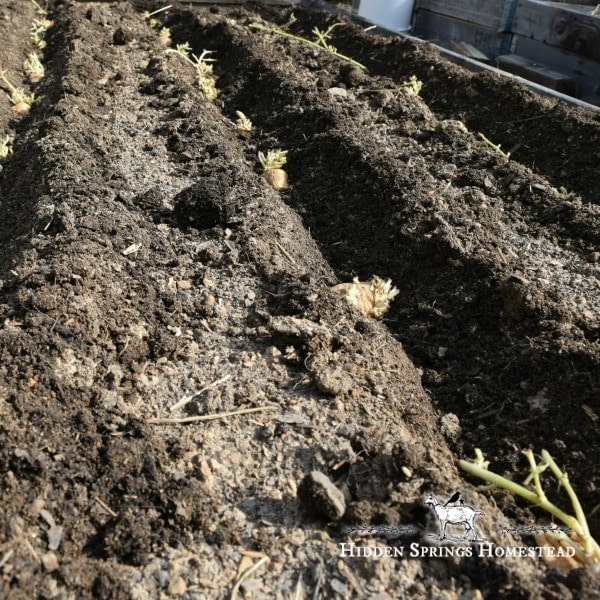
3. Next, place potatoes, sprouted eyes up (cut side down), 12 inches apart, in the fertilized trench.
4. Lastly, cover the potato back over the soil. Mounding the soil, do not press down; simply pile the soil on the potato. (Potatoes should end up at least 6 inches deep in the garden soil).
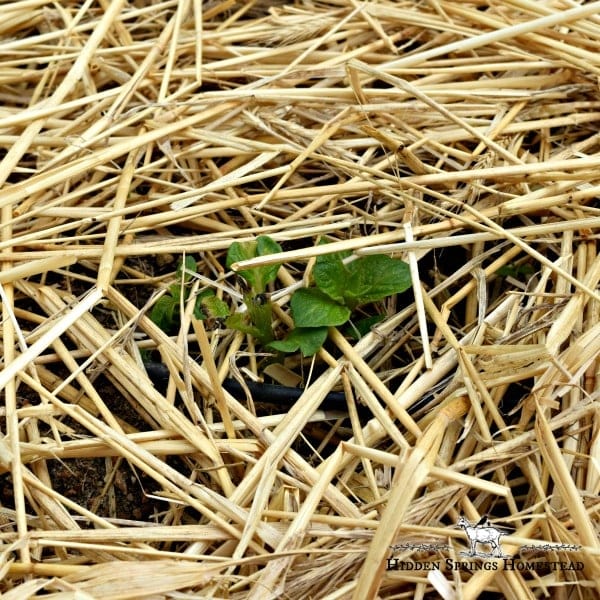
Mulching
Cover the area with straw or mulch to keep the soil moist to allow the potato to continue to sprout. They will grow and find their way up through the soil.
How long does it take to grow potatoes? They should emerge from the soil in about 2 weeks (14 days). It’s exciting when you see them beginning to poke up through the mulch. Gorgeous green leaves are reaching up for the sun.
Frost Protection
What does frost do to potato plants? The mulch around the plants will help to protect the small, young plants from a freeze.
Symptoms of frost damage will vary from the blackening of the leaves to the death of the whole plant above ground. Fortunately, since the tubers are below ground, they will send new growth up again within about 2 weeks.
Most young plants can shake off a frost or even a light freeze and continue to grow. But if you can, protect them since this may not kill them, but it does slow them down.
You can either pull soil up around them or cover them with mulch. If they are too big for these, you can cover them with light blankets or buckets, or an easier solution is to cover them with frost covers.
We had a “hard freeze” this week, and the tips of the potato leaves were bitten by frost (black tips). They were OK, covered with straw, and only the tips were affected.
Hill Around the Stems – Increase Yields & Flavor
A fourth secret to growing potatoes is hilling. Potatoes are happiest in slightly acidic soil with good organic amendments and prefer to be deep in the soil in darkness.
Once potatoes are growing, you may notice potatoes that have come to the surface.
Allow them to grow to about eight inches high, then cover them back to around four inches with soil, compost, or straw. Continue to hill until the potatoes begin to flower.
So your hills can end up 12-18 inches high. You want to hill because the more you hill, the more harvest you will have.
It’s important that potato tubers are not exposed to sunlight. If they are, it causes the skin to turn green and produce a chemical called solanine.
This chemical tastes bitter and can be toxic in large quantities. Therefore, keep them covered.
If you need to cover them, it’s best to do it early in the morning before the plants droop with the hot sun. Just continue to do this until you can no longer pull the soil up around the plants.
Doing so will force the roots to grow even deeper and reach for the sun again, resulting in increasing your potato crop yields.
Watering
Potatoes depend on regular watering. It’s so easy for gardeners to say plants need at least 1 inch of water a week, but how do you know if they are getting a full inch? Here in the south, our temperatures get very hot and humid; therefore, only 1 inch is stressful on plants.
Therefore, I use an irrigation system from the Drip Depot. It is specifically designed for raised beds, and I love it! I do recommend this company! The only product they sell is irrigation, which they are experts at.
Keeping your potatoes well watered throughout the growing season is important, especially when the vines are flowering. Flowering triggers the root system (tubers) to grow, which, of course, gives you potatoes.
Keeping potato vines watered with 1-2 inches of water a week is crucial to potatoes producing a crop for harvesting. I have my irrigation system timer set to come on three times a day for 15 minutes.
I find that if I keep the soil moist, not wet, my harvest is larger.
A good rule of thumb: In a raised bed size 4×12 feet, a 50-gallon drum of water will provide that bed with 2 inches of water. Think about this, as it gives you an idea of how much water your plants need.
Can Potatoes get too much water? Consistency is the key to a successful potato crop. As long as the crop is kept moist, it will be happy and productive. But it doesn’t need to have standing water. This will cause them to rot.
But if they are starved for water, this forces them to grow ears and noses and split as well. This occurs when they have been allowed to dry out too much and then receive a good deep watering or thorough soaking.
Harvesting Potatoes
Harvesting is the fun part! It’s like digging for buried treasure, only much more tasty. The soil will need to be dry when you harvest.
Baby (New) Potatoes
This potato harvest has several names. New potatoes, baby potatoes, or early potatoes. They can be harvested as soon as the vine begins to flower.
Wait for the bud to bloom and drop, and then they are ready to be harvested. These potatoes will be about the size of an egg.
Gently and carefully dig deep into the soil and find small “baby” potatoes that are not fully grown. These can be prepared for cooking with no problems.
NOTE: New or baby potatoes cannot be stored. They have to be cooked and eaten immediately. So don’t harvest more than you need for a meal.
Mature Potatoes
If you plan to store potatoes over winter, they should be left in the soil to continue growing until they fully mature. A simple way to know when to harvest is to wait for the vine to die back and turn brown. Then it can be removed mature potatoes can be dug.
If you prefer, they can be left in the ground and removed right before the first frost. Digging them before the first frost is important.
I should warn you, leaving mature potatoes in the ground longer than necessary does invite voles and mice to feast on them.
How long do potatoes take to grow? New potatoes can be ready for harvest in about 10 weeks. Mature potatoes will take longer, around 80-100 days.
Best Way to Harvest Potatoes
The best way to harvest potatoes is to use a potato fork and gently dig deep into the soil. Being careful not to injure the potatoes.
Unfortunately, as you dig, there will be times when a potato is gouged or bruised. Damaged potatoes will rot during storage. Therefore, these should be used as soon as possible instead.
Lightly work the soil loose around the roots; you can pull up most of the potatoes attached to the plant. But once the plant is out, go ahead and dig around in the soil to find any that you may have missed.
Additional Tips for Harvesting
- During August, just before harvest, cut back on watering to only a light watering. This causes the skin to toughen up before they are dug.
- Do a test dig to check the potatoes’ maturity before digging the crop. This can be tested by rubbing the skin of the potato. If this skin is thick and stays in place, it’s mature and ready to harvest. But if the skin is thin and peels off when rubbed, it’s still new and should be left in the ground longer.
- If you dig a potato with small green spots, these can be trimmed off when cooking. But a full green potato is better tossed into the compost pile instead of eating it.
Curing Potatoes
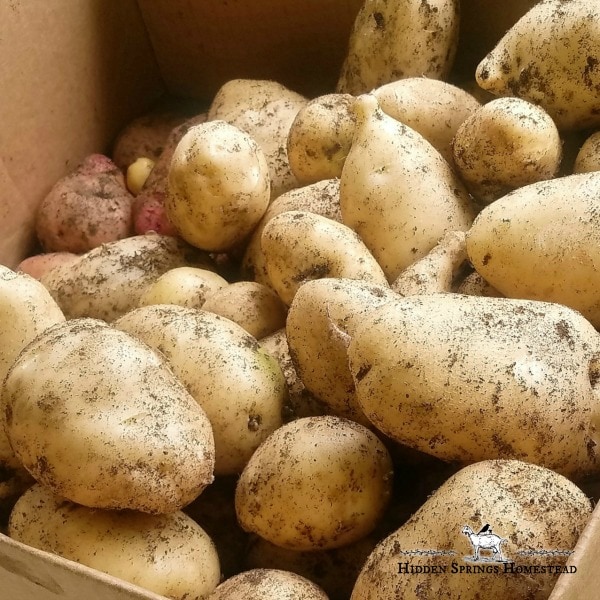
Freshly harvested potatoes should not be washed. Doing so will cause them not to store well.
Instead, use your hand and lightly brush off any soil and let them sit in a dark area with temperatures of 45°-60°F (7°-15°C) degrees for about two weeks. This gives the skins time to harden and seal off any injuries. (They should not be exposed to any light).
Once the skins have cured, they can be stored in cardboard boxes in a dark area with a consistent temperature of 40°F (7°C).
A concrete pump house, root cellar, or basement is perfect! But they shouldn’t be placed on a cold concrete floor. Instead, Cover the concrete with cardboard and lay them on it in a single layer.
Or, if you don’t have space to lay them out flat, you can store them in cardboard boxes with layers of newspapers between them. This is the method I use.
I use easy-to-handle sizes such as a copy paper box and lid. I layer shredded paper about two inches deep on the bottom and spread potatoes on it with a little space between them so they are not touching. This gives them lots of air circulation.
Then cover with another layer of shredded paper, and add another layer of potatoes. I will do around 4 layers of potatoes. So I have to use multiple boxes.
If you don’t have access to shredded paper, layers of newspapers will work just as well.
Store the boxes in a dark closet or room, keeping the temperatures as cool as possible, preferably around 65°F (18°F) if possible. Potatoes that are kept at a consistently cool temperature can store for up to 4 months.
More in-depth information about harvesting & storing potatoes can be found here. You’ll see my step-by-step process with pictures.
Disease and Pests
A way to help control pests in the garden is to rotate your crops from year to year. You shouldn’t grow potatoes in the same location two years in a row.
In other words, in the rows where you planted potatoes this year, a root crop should not be planted in this area next year. You’ll need to skip 1-2 years before returning a root crop in this garden space.
Potatoes are susceptible to pests and diseases such as:
- Voles – these are tiny little creatures, very much like a mouse, that burrow under the soil. They can chew on the potato while it is deep in the soil.
- Aphids – these can be blasted with a water hose to remove them
- Flea beetles – they like to hide in the weeds, so be sure to keep your potatoes weed-free. Keep the area around your plants spread thickly with crushed eggshells. This will cut the beetles as they land on the eggshells helping to control them.
- Leaf Hoppers – they, too, can be blasted with a water hose
- Potato Blight – is a fungal disease that is capable of destroying an entire crop. To help in preventing never plant potatoes, tomatoes, or the nightshade family in the same area without at least a three-year rotation. This disease can overwinter in potatoes that are left behind, so it’s critical to remove volunteers that may sprout the next spring.
- Potato Beetles – these will need to be hand-picked from your potatoes. Remove any eggs you may find as well by hand. (I keep a 5-gallon bucket filled around 6 inches deep with water and dish soap during the growing season. I pick the beetles off and toss them into the water solution. The dish soap is toxic, and they drown in the water. (Do not “smash” beetles. They let off a pheromone that attracts others to come to help an injured comrade, which can cause an infestation to grow)
Saving Potatoes for Seed Potatoes
Potatoes can be saved from year to year. The potatoes I planted this year were left over from last year.
Choose the best-looking potatoes that are free of bruises, blemishes, etc. Next, can cure them along with the crop, but place them in their own storage container. They should be well-ventilated and kept at 35° – 40°F (1.6°-4.4°V)
Check on Potatoes
Check on your potatoes every couple of weeks. Remove any that are rotting or beginning to mold, as these will cause the rest of the crop to rot.
At times, after a couple of years of saving from year to year, you may find that the size of your mature potato is decreasing. If so, start over with newly purchased seed potatoes.
Come next season, these will be spouted. Any potato with sprouts can be used as seed potatoes.
Will you be growing potatoes in your backyard garden this year?
Classic Potato Recipes
- Southern Style Fried Potatoes
- Creamy Mashed Potatoes
- Crispy Oven Hash Browns
- How to Make and Freeze Homemade Hash Browns
- Best Ever Stove Top Hash Browns
More Gardening Tips
- How to Plant, Grow, and Harvest Green Peas
- How to Grow Carrots
- Planting and Growing Green Beans
- How to Grow Cabbage
Connect with Hidden Springs Homestead!
Be sure to follow me on social media so you never miss a post!

Dianne Hadorn is the owner of Hidden Springs Homestead, nestled in the hills of East Tennessee. A Master Gardener and lifelong homesteader, she teaches families how to grow real food, preserve it with confidence, and depend less on the grocery store. Through her practical, down-to-earth approach, Dianne has become a trusted source for beginners who want to build a sustainable lifestyle and fill their pantries with food they’ve grown themselves.
Hi Dianne, I live in San Jose Ca. and I just harvested my potatoes. What fun. It is June 3rd. Can I plant again? Also I had great luck with carrots coming up but they got so tall and lush but not carrots. What the heck!!!!! Love your site. Angi Cirigliano
I’ve seen you mention using Dawn dish detergent for insect control a few times. I just wanted to mention that it doesn’t HAVE to be Dawn. Soap, in general, is the napalm of the insect world. If spraying on a living, producing plant, Dawn, in particular is harsh enough to damage the cuticle of the plant. Even a milder soap like 7th Generation or Dr. Bonners should be diluted at about a teaspoon of soap per quart of water to keep from stressing or harming the plant. For picking off insects or eggs, make it MUCH stronger in the bucket.
Just a small detail. I love your newsletter.
Hi Janine,
You are so right! Sorry, it’s a habit since Dawn is what I use, but it can be any soap. I also agree with you when using soap, in general, as a foliar spray, it should be diluted. Thank you for reading my articles, and if I can help in any way, please feel free to ask.
Happy Gardening,
Dianne
We live in central Alabama, just wondering if anyone had any suggestions on how to keep the ants out of our potatoes?
Hi Cindy,
Ants are such a nuance. I hope it is common black ants and not the horrible fire ants. I’ve dealt with them a couple of times this week. I had a big pile appear after some heavy rain. I do a process of elimination to see what works or maybe wear them down a bit. I’ve written this article about getting rid of ants in the garden. I’ve found that with common black ants, I can get rid of them using Diatomaceous Earth, but the fire ants are more aggressive and harder to get rid of. I’ve had to go the Borax route with them, but it worked.
Dear Dianne,
Thank you for all the great information. This is my first year that I am growing potatoes. I will be growing in large containers. When I cut the potatoes where the sprouts or eyes are does it matter which way I plant them? With the sprouts up or down and how far apart should I plant them? I have about a 6 gallon container. I have 5 seed potatoes before they are cut. They are about the size of medium tomato. After I cut them I should have about 12- 15. Thank you for all your help. I’m from Pittsburgh, PA, so we never know what our weather will be!
Hi Beverly,
You’re welcome, and I’m so glad you are growing potatoes. Once you cut them, you’ll want to plant them with the sprouts up. For a 6-gallon container, I’d recommend putting 2, a maximum of 3, in it. Potatoes need to be planted about 18 inches apart to have room to grow. I’d also recommend not filling your pot to the top with soil. Rather, fill it about halfway and plant. Once the green leaf break soil put about 4 more inches of soil on top of it. This will give it space to grow deep. Potatoes need deep soil and room. Good luck, and let me know if you have more questions.
Happy Gardening,
Dianne
My grandmother loved to let an eyed potato sit in the windowsill over the kitchen sink! I don’t think she ever produced actual potatoes, or even planted them for that matter.
After her passing in 2020, I have a soft spot in my heart for the eyed potato out of the bunch. Needless to say I have a red potato and a regular potato that began sprouting ON TOP OF the pineapple plant I have on my kitchen table. The vines are about 2 1/2 ft and not at all leafy at all like the ones I’ve seen pictured.
Should I pull up the potatoes and replant?
Hi Harley,
I have never seen a red or regular potato grown as a house plant as I think you are describing. Now a sweet potato will produce a lovely green lush vine, which is attractive. Maybe this may have been what your grandmother grew on her windowsill, maybe? I’ve done this with sweet potatoes in a mason jar of water to get them rooted and then transplanted into a large pot. The vines are gorgeous. A regular potato will grow green leaves but not a vine, so this may be what you are experiencing.
For your question, to pull it up and replant, I’d give it a try in a larger pot or even a 5-gallon bucket. If the chits are too long, you might cut them shorter and see what happens. It could make for an exciting experiment.
Dianne, thank you for your sharing your experience and skills. I am so excited to plant my first potato eyes in a big pot in Japan. I would not have known the first thing to do if not for generous people like you!
Hi Donetta,
So glad to help. Please, if you have any questions, feel free to reach out.
Happy Gardening,
Dianne
Hi, can you plant potatoes in containers?
Hi Brenda,
Yes, potatoes can be planted in containers. It does need to be a larger container roughly 2.5 gallons or larger. Like this one would work well or even get these and grow several.
What type of fertilizer and how often do you fertilizer?
Hi Jack,
Wow, great question! I’ll be honest, you may or may not like it, and I don’t mean that to be rude at all. I know in “today’s” society or agriculture training, there is a lot of talk about fertilizers. And I don’t use any synthetic (manufactured ones) at all. These are why we grow 65% of our food. So I’ll do my best to answer in a way that makes sense.
When I initially plant, I will do a “light” spread of this. And by light, just a dusting, and then after the planting, I do no other type of fertilizing. Rather, my focus is ALWAYS on soil quality and structure. Since we built raised beds, I had total control over what went into them, but that does not always mean the garden soil we purchase from the landscape companies is the best choice. These two posts will shed some light on what I’m saying. Soil Structure, Why I’t’s Important and Healthy Soil is Necessary.
We just moved to a new farm, and I am starting all over with in-ground beds, and I’m sacrificing year one of having a garden. I’m am currently hauling in woodchips, leaves, and cardboard to “build” up the soil with organic amendments. And another thing I do is rather than have a compost pile I bury foods and such that would go into the pile in my garden. So I’m consistently feeding my soil with organic foods and amendments. I’d be glad to help you with instructions and a guide if you are interested. No cost, I want you to succeed. I hope this helps.
Hi there, I am wondering why my potatoes plants grow so tall! Despite the fact I plant them in rows, about 4 inches deep and follow the rule of thumb to cover them, the plants grow so tall and end up falling over. Is there a way to stop this? The seedling is about 2 feet underground by this time. I am in the Pacific Northwest ( Vancouver, Canada).
Hi Andrea,
You are doing great! This is normal, my potato plants fall over as well. The continue to grow and produce after they fall. I’ve not conquered those gorgeous rows of potatoes that stand straight up either. Just continue to pull soil up around them as they grow all slumped over. Once they die back, they are ready to harvest.
Hello Dianne,
Coming to you from central Ohio. Thank you for your concise and straight forward approach to sharing your potato knowledge. I’m keeping this “pinned” for future reference – going outside now to test the soil temperature! Here we go!
Hi Debbi,
I am a first year gardener in Colorado. I have a raised bed for potatoes because the soul here is so bad . Very sandy and hard pan about 6-8 inches down. My potatoes looked pretty healthy at first but now (about 10 inches up) some are getting a leaf curl on the tops. Looks bad but I dont know what it is or what to do. Help!
Hi Sharon
Leaf curl on potatoes can be caused from a few different things. I can throw several ideas/questions at you and you can at least have some homework to do.
You said that you have a raised bed, do you know anything about the soil you filled it with? Did you do a soil test? This could be helpful in diagnosing if they are lacking some nutrient. Another cause could be that the plants are stressed. Such as high temperatures, not enough water, soil nutrient needs, etc.
Or have you noticed any insects on theme? If so, what do these look like? Aphids are often the problem. They become infected with a Luteovirus and then inject this into the plant when they eat on it. This will suck the life out of leaves and cause curl and then stink bugs can cause this too.
These ideas will give you a starting point to “pin down” the cause. And then once you figure out which it is, I can help you to treat it naturally or organic without chemicals or pesticides.
Keep me posted,
Dianne
My Potatoes have very long sprouts on them can i trim them before planting them.
Hi Deanna,
Sorry for the delay in response. We have been moving. But to answer your question, sure you can do that. Mine are sometimes a foot long or so. And, if the potato has other sprouts on it, you can just remove the super long ones by just pulling it off.
Hi, I cut potatoes got a moldy. I tossed the ones that were completely covered in mold but planted some that had just a little mold. Is this OK? I got a little scared after I did it because my husband is allergic to penicillin which can be found in mold and wondered if my crop would have it in It since my seeds do?
Hi there,
I’m glad to say that you are ok. No worries. The eyes will sprout and your potatoes will be safe to eat.
Happy Gardening,
Dianne
I read where you can leave the potatoes in the ground until it frosts. Can you leave them in a raised bed in a green house until you get ready to use them?
Hi Jojanna,
Great question! And the answer is YES! I actually did this last year by accident and it worked wonderfully. My raised beds got out of control, that’s another story, but I failed to dig up a whole row. Come spring, they started sprouting and I got to digging around and discovered them. I dug them up, cooked and eat them. They were perfectly fine. Just a note, don’t let the soil get to shallow on them if you leave them. They need to be completely and well covered to keep from freezing.
Happy Gardening,
Dianne
When I cut my potatoes and let them sit they cut sides got quite grey and don’t look healthy. Should I discard them?
Hi Marlee,
Great question. No, this is totally normal. It’s the starch in them that is exposed to the air. They are totally safe to plant.
Hi Diane,
This is my first year to have a garden and first attempt at growing potatoes. I am happy to report the leaves have popped up! It was so exciting to see them. I was told by someone at IFA that once the leaves come up you can dig them up and re-bury the leaves in the soil to get more potatoes. Do you know and trust this technique? I would love a bigger harvest but obviously don’t want to mess up the growth. I am in SLC Utah. Thanks for any input!
Hi Kim, That is a great question. You can help your plants to create more potatoes but not by “digging them up.” What you want to do, is once the leaves have popped up through the soil, let them continue to grow and reach for light for about 2 weeks and then put about 4-6 inches of good rich soil on top of them. This should “cover them completely.”
But in a few days, they will quickly pop back up through the soil again. The tubers (potatoes) actually grow off the mini stems off the main stem so covering it will promote more potatoes. Once they have popped through a second time, let them grow for about 3 weeks and then it’s time to start pulling soil up around them, but NOT covering them.
Just use your hands or a hoe and gently pull up some rich soil or place some good rich compost around them keeping them in sort of a “mound” of soil. If you don’t have enough soil, you can use homemade or purchased compost or soil. Just don’t use fresh manure compost, it should be at least a year old. This will keep them from getting “scab” which is a disease caused from fresh manure. They would still be edible with scab but just real ugly.
Be sure to keep soil pulled up around any actual potatoes you see peaking out of the soil, because exposure to sunlight will cause them to turn “green” and then you should not eat them.
Hope this helps. If you have more questions, please feel free to ask.
Happy Gardening,
Dianne
Can you plant potatoes in June I live in Tennessee
Hi Linda,
My answer to the question is yes. I’m sure others may tell you no. The reason for this – they will require extra watering and care and a lot of people don’t have the time to do extra manual watering. If you have an irrigation system, you’ll do great, if not, maybe pick up a “soaker hose” and water them often. Our summers tend to be dry, as right now, we are on day 15 with no rain and mine are fine – but I irrigate about every 3 days. Especially this time of year. So if you are willing, it may be a bit more work, labor wise, they should do fine with enough water.
I have some out here in a box that have chitted and I’m thinking when I pull beets this week to can them, I am going to go back with the potatoes in that bed.
The heat will not hurt them, it’s the lack of water this time of year. They still have plenty of time to bloom before fall and threat of frost.
I hope this helps, if something isn’t clear, feel free to reach back out.
Hi Dianne,
Enjoyed your article. I live in upstate NY and have been growing potatoes for 10 years. I just dig a hole, throw them in, cover with soil and hay. It’s my greatest joy to Scoop them out of the earth in early fall and weigh my crop! I get 200-300 hundred pounds. The taste of organically home grown potatoes surpasses anything store bought. I have never rotated my crop though. I have millions of huge earth worms that enrich and aerate the soil. I also rarely water them after they have sprouted since our climate is quite different than yours and get plenty of rain. I am envious of your much longer growing season, we even had snow today. I look forward to your other articles.
Hi Debbi,
Thank you for commenting. Upstate-NY! I’ve never gotten to visit but I’ve heard it is gorgeous. My dear friend is actually from there so I hear lots of stories. Potatoes are so funny to me! They just want to grow and willing to do it most anywhere. I love the idea of digging a hole and throwing them in. 200-300 hundred pounds-wow! That’s a lot. If we did a hole here in the south, about 6 inches down we hit super-hard-red clay or chirt and nothing, but weeds, will grow in it. Since we have only a couple acres, don’t own a tractor, and it’s for sure not level, I’ve opted to go all raised beds. I garden in 25 of them. We do have a long growing season, but remember it gets really hot and extremely humid. We go for 3-6 weeks without rain. At times in the summer, the humidity actually makes it hard to breath outside because of the pressure. SNOW! Around here if we get 1/2 of snow it shuts the schools, gov offices, etc. We don’t do well in the snow. Tennessee is beautiful, but like NY, it has it’s weather issues as well. I’m so glad you enjoyed my article, and thank you so much for your comments. I enjoy hearing how others garden.