
Hidden Springs Homestead may earn a commission for purchases made after clicking links on this page. Learn More.
We had a really good potato harvest this year. Since having so many potatoes and not enough storage space, I started thinking about how to use them over the months to come.
My family loves hash browns, so making a big batch of homemade hash browns to freeze ahead just made sense.
If you’re all about quick weeknight meals, having freezer-ready homemade hash browns on hand is a huge help. Whether you grow your own potatoes or buy them from the grocery store, this is an easy way to stock your freezer and save time later.
Supplies Needed to Make and Freeze Homemade Hash Browns
You will need, of course, freezer bags. I use 1-gallon Ziploc bags and fill them pretty full. Also, to shred the potatoes, I use my Hamilton Beach food processor. I love, love, love this thing. I use it often.
If you don’t have access to a food processor, a hand grater like this one will work too.

RELATED: Looking for easy ways to preserve your garden’s bounty? My Ultimate Food Preservation Guide has all the answers you need to freeze, can, or dehydrate your favorite foods.
You will also need a couple of large mixing bowls. I use my Pyrex mixing bowl set for everything.
What Potato is Best For Homemade Hash Browns?
There are over 200 varieties of potatoes. Some make really good homemade hash browns, and others, not so good. Of course, we can’t talk about all 200, but I can go over a couple of tips for ya. Depending on how you like your hash browns will depend on the type of potato you use.
If you are like us, and like the homemade hash brown to “stick together and be crispy,” I would recommend the basic Russet or Idaho potato.
On the other hand, if you like homemade hash browns to be “slivers”, as I describe them, of individual shoestring hash browns, then go with a less-starchy potato like a Yukon Gold or Red Fingerling. These can often be found in the grocery store.
Easy Homemade Hash Browns
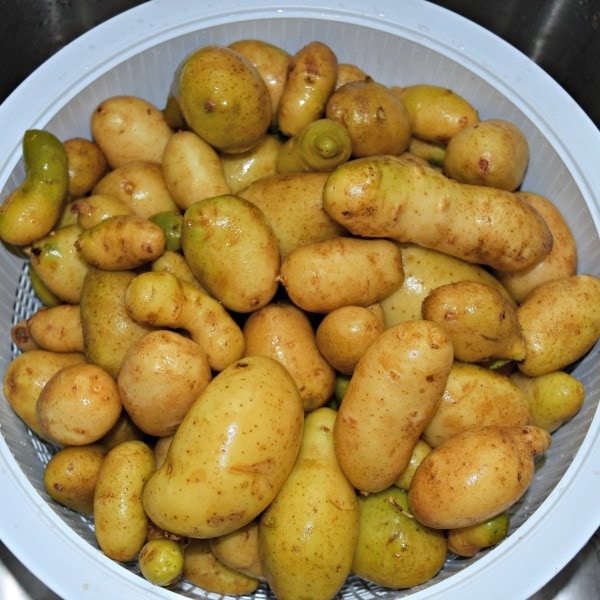
Wash and peel potatoes if desired. Peeling is not necessary; I don’t peel. My family likes the peels, and you get both vitamins and fiber from them. You do need to wash and scrub the potatoes if you don’t peel them.
I chose our smaller potatoes to make my homemade hash browns. The size of the potato really doesn’t matter. If you are using a food processor, you may need to quarter them to fit into the food processor’s shoot. I do.
Before you begin shredding, fill a large mixing bowl with ice water and 1 tablespoon of salt, and mix well. Set the bowl aside on the counter near the work area. The ice water helps to keep your shredded potatoes from turning brown.
Using clean potatoes, shred them and immediately place them into the ice water.
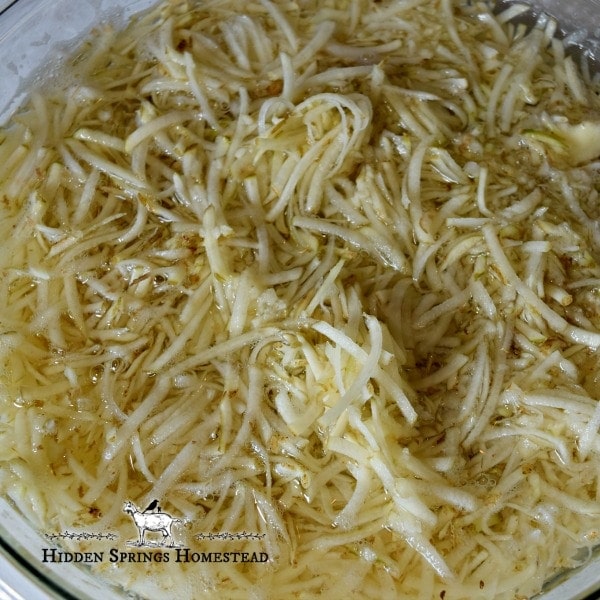
Once the bowl is pretty much full. Pour potatoes into a large colander and rinse under cold water until the liquid runs clear. This is washing the “starch” off them.
Allow potatoes to drain for 2-3 minutes, then place handfuls into cheesecloth or dish towel to squeeze potatoes as dry as possible. This will help prevent sticking together during flash freezing.

I do recommend squeezing them over a colander. I have had the unfortunate experience of them squeezing out of the cloth and falling into the sink.
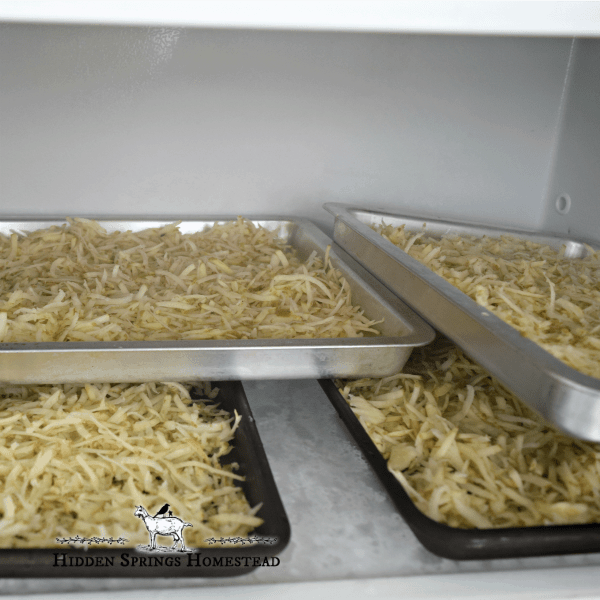
Once you have your raw hash browns dried, place them in a single layer onto a parchment paper-lined cookie sheet. Unbleached Parchment paper is non-stick even after freezing.
Place the cookie sheet in the freezer, uncovered, for about 1 hour. This process is called flash freezing. This video from One a Month Meals will teach you more about flash freezing.
After about an hour, remove homemade hash browns from the freezer and quickly place them into 1-gallon Ziploc bags. Label and store them back in the freezer until ready to use.
Once your hash browns are frozen, you can cook them either on the stovetop or in the oven. I walk through both methods step-by-step so you can choose what works best for your kitchen.
So will your family be having hash browns this week? If so, what will you be serving with them?
More Easy Delicious Recipes:
How to Make and Freeze Homemade Hashbrowns

Making homemade hash browns and flash freezing for storage. Hash browns are a great side dish for breakfast or dinner. This easy to follow recipe will help you to make your own hash browns from scratch.
Ingredients
- 5 lbs potatoes
- Table Salt
Instructions
- Wash and scrub potato skins well. (Peeling is optional)
- Fill a large mixing bowl with ice water and 1 tbsp salt, set to the side of work area
- Using clean potatoes, shred using food processor. As processor fills, empty into bowl of ice water
- Once mixing bowl in full, pour shredded potatoes into a large colander and rinse under cold running water until liquid runs clear. (Removing starch)
- Allow potatoes to drain for 2-3 minutes in the colander and place into a large cheesecloth.
- Empty shredded potatoes onto a cookie sheet lined with parchment paper. Spread into a very thin layer
- Place cookie sheet in freezer for about 1 hour to flash freeze
- Remove and place hash browns into a gallon Ziploc bag. Label and store in the freezer
- Repeat until you have finished the 5 lbs of potatoes
Notes
Remove as much air as possible from bag.
Connect with Hidden Springs Homestead!
Be sure to follow me on social media so you never miss a post!

Dianne Hadorn is the owner of Hidden Springs Homestead, nestled in the hills of East Tennessee. A Master Gardener and lifelong homesteader, she teaches families how to grow real food, preserve it with confidence, and depend less on the grocery store. Through her practical, down-to-earth approach, Dianne has become a trusted source for beginners who want to build a sustainable lifestyle and fill their pantries with food they’ve grown themselves.
I got thru the freezing ok I think
But cooking not so good. HELP!
Hi Michelle,
Tell me what you did and how I can help.
Hello! I definitely want to try this! I was looking for a recipe that I did not have to boil the potatoes first! What do you think about me also putting some diced onion in with the shredded hash browns? I also like to know if I could season them and then freeze and what seasonings would you recommend?
Hi Rayson,
I’d suggest adding your diced onions and seasons them when you are cooking them rather than when freezing them. This is the way I do it and it works great.
Is this process exactly the same if you’d like small cubed hashbrown instead of grated? Or would you have to bake them a bit after soaking/drying?
Hi Deanna,
I have not tried making them in small cubes, so I’m not totally sure. I would think as long as they really small cubes they wouldn’t need prebaked. If you try it, be sure to let me know.
Washing your Potatoes – I noticed in one of the photos in the article above that you were using a wooden handled scrub brush to clean/wash your potatoes. Another quick and easy “tool” you can use for this task is a “scrubbie” sponge… They are ones that are a sponge on one side and a coarse plastic weave for scrubbing on the other side and about 3″ X 5″ X 1/2″ thick. When wet, the scrubbing side will conform to the shape of the potato and remove the dirt. etc. while leaving the healthy, outer layer of skin. You scrub your potatoes using the coarse side of the sponge as you would with a brush and spin/twist the potato in the coarse side to do the ends. It’s quick, easy and the water from the bristles on a brush doesn’t spray everywhere. Also, the “scrubbie” is easy to clean. Simply rinse it to remove any residue, wring out the excess water and toss it in the microwave for 2-3 minutes to dry and sanitize.
Instead of using cheesecloth to dry could I use small quantities in a salad spinner?
Also could I add chopped onion before freezing?
Hi Ken, You could certainly try this, I’m not sure, to be honest. Yes, you can add chopped onions before freezing, but they may also become really strong. I’d recommend adding them when you cook them. But of course, try it to see how it goes.
I can’t flash freeze due do the size of my freezer. Can I just freeze them?
Hi Brenda,
Of course, you can, but if you can, I’d recommend using the largest bowl you have that will fit in your freezer and then layer them in thin layers, separated by parchment paper. The idea of flash freezing is to prevent one big chunk of hash browns that are impossible to separate. Once they are frozen in layers, then remove them and pack them into your Ziploc bags or container you plant to use. Go ahead and play around with it to see what works best for you. Let me know how it turns out.
Have a great day,
Dianne
This was a very helpful post! I bought a bunch of potatoes and didn’t end up using them all, but I didn’t want them to go bad. Quick easy, no waste!
How long do they last for in freezer? I want to put a use by date on them when I seal them
Hi Maureen,
Remove as much as much air as possible. In a Ziploc 8-12 months. If you vacuum-seal them and remove “all” the air, they will last a bit longer up to 18 months.
Wow. Other websites said to blanch first. I thought to myself, “Good grief. These are shredded potatoes. Won’t they end up like mush?” I’m so glad I found this article. We will try it this gardening season. Thank you.
Thank you so much for this tutorial!
Your recipe just tells you to grate and freeze the potatoes. I want to know how to make patties to be frozen and fried when needed
Regards
Hi Shan,
Here you go… Oven Baked Hash Browns and Stove Top Hash Browns
Oh, this is perfect! I’ll try it with the food processor. Thank you for this tutorial!
Eh? So you have shown us how to make grated potato that is flash frozen…. then what?????
Hi Giselle,
The end of the post tells you to label and store in the freezer until ready to use. I’m not sure what your “then what????” is.
The post is “how to make and freeze homemade hash browns” I’m currently working on a tutorial post how to cook them. I will be linking the two together in a couple days.
Does this help?
Did the hash brown turn brown after freezing?
Hi Liza,
They tend to get a hint of color, not totally white, but not “brown.” After flash freezing them, place them into a freezer bag and remove as much air as possible. And when you go to cook them, don’t thaw them, just toss them into the frying pan or the oven – whichever way you prefer to cook them.
Let me know how they turn out.