
Hidden Springs Homestead may earn a commission for purchases made after clicking links on this page. Learn More.
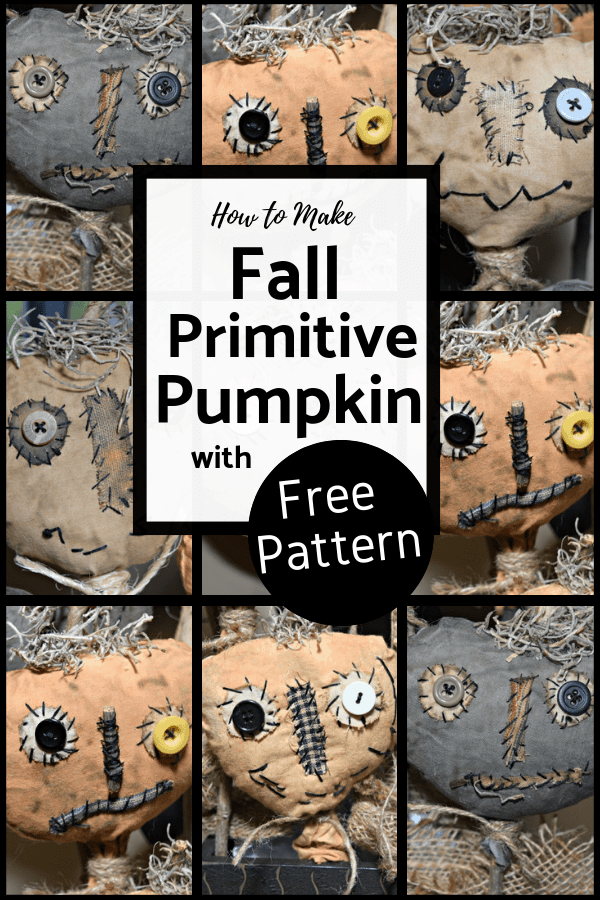
All my life, I’ve loved primitive decor, with fall primitives being my favorite. If you love it too, you’ll love this FREE tutorial, How to Make a Fall Primitive Pumpkin Head on a Stick.
Included below is a free printable pattern. Handmade primitive crafts are for sure one of my passions. Do you feel the same? If so, you’re in the right place.
I get excited seeing all the fall primitives on Pinterest and “love-love-love” creating my own, as I know you do too!
If you are looking for budget ideas for decorating for fall, you’ve hit the jackpot! This cute fall primitive pumpkin head can be done with totally free scraps of materials.
Fall Primitive Pumpkin Pokes
This is a free tutorial with a free printable pattern. It’s super easy and fun to make. Enjoy!
Materials:
- Instant Coffee (for staining)
- Orange Craft Paint
- 1/8 yard Muslin Fabric (or 2 pieces of scrap big enough for the pattern – I use scraps)
- Fiberfill
- Scrap – homespun fabric (nose)
- DMC Thread – Black #310
- 2- Buttons (they don’t have to match)
- Spanish moss
- Jute or twine (about 8 inches)
- A slim stick from outside about 14 inches long (cut in 2 pieces: 3 inches and 11 inches)
Since the stick adds a bit of fall natural element to the pumpkin, the measurements don’t have to be exact. Mine are all different lengths for displaying them in various crocks, wood boxes/crates, on the front porch, etc. They can be used anywhere you choose.

Tools:
Fabric Cut Pieces:
Using the Free printable pattern – Cut –
- 2- Pumpkin heads (pin together)
- 2- Round eye patches
- 1- Nose from homespun fabric

Instructions:
Sew together the 2 headpieces, leaving the TOP area open and the bottom; I use this Sewing Machine, but you can also sew the pieces together using a straight hand-stitch. Turn the pumpkin head out so the seam is inside
Mix 2 tablespoons instant coffee in a small bowl with 1/4 cup water – heat in the microwave.
Wet the muslin pieces with water BEFORE putting them into the coffee solution. This will help them absorb the coffee stain more evenly. Let them soak for 5-7 minutes in the hot coffee mixture, then remove them and lay the eyes flat to dry.
Add 5-6 drops of orange craft paint to the coffee, stirring well. Place the head back into the coffee/orange solution, let it sit for another 5-7 min., remove it, and lay it flat to dry.

Let dry overnight OR place on a cookie sheet in the oven at 150 degrees and dry. (either way)
After the Fabric is Dry
Using fiberfill, stuff the head to the desired fullness. Tie a loose knot on the bottom to hold it in place. This will help you place the eyes, nose, and mouth correctly.

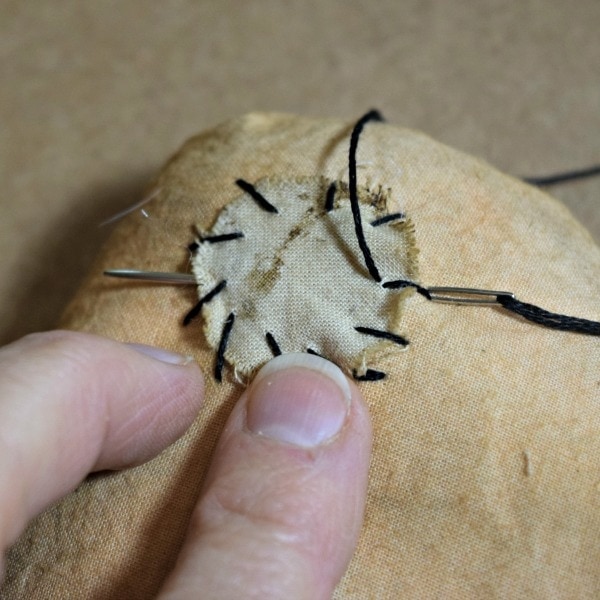
Thread 3 pieces of DMC thread into a large eye needle (I use a #18-22 with a sharp point). Place eyes on the head in the place you would like them. Randomly stitch large stitches around each eye to hold it in place. (tip – if you don’t want the knot to show, start “under” your eyepiece and bring thread out -this will place the knot under the eye not to be seen)
Place the nose where you would like and stitch randomly around it, securing it into place.

Now for the mouth. This is where he comes to life! I like to look at the “shape” of the head and decide what expression my fall primitive pumpkin will have. The mouth says it all. He can be happy, frowning, puzzled, etc. This, to me, is why I love primitive crafts. They don’t have to be perfect!
Using long random stitches, stitch the mouth using the same DMC thread.

Lastly, sew on the buttons for the face, and you will see what expression your fall primitive pumpkin has!
Attaching Stem:
Insert a short 3-inch stick into the open space in the top head center. Using a hot glue gun, glue in place. Take just a bit of Spanish moss and glue in place around the stick (this will hide the glue)
Secure a long stick in the bottom of the head and tie the jute knot tighter. “Wa-La – it’s done!” Ready to be put into a fall arrangement of your choice to be enjoyed?

It’s super cute and super easy. So, if you are looking for primitive crafts to make and sell or if you are just looking for homemade primitive craft ideas – I hope you enjoy your very own handmade fall primitive pumpkin head.

If you enjoy DIY decorating, you’ll probably enjoy Making Your Own Stencils, too. Take a look.
MORE FALL CRAFT IDEAS
Do you enjoy primitive home decorating ideas? If so, be sure to open my weekly newsletter. You never know what surprises it will contain.
What easy DIY fall crafts do you make? Feel free to share! I’d love to hear about it.
NOTE: If you have an issue downloading, please ensure your pop-up blocker is disabled. The download opens the file in a new window.
How to Make a Fall Primitive Pumpkin Head on a Stick

Create your own Fall Primitive Pumpkin Head. This is an easy pattern and fun to make primitive craft. Primitive crafts to make and sell.
Materials
- • Instant Coffee (for staining)
- • Orange Folk Art Paint
- • 1/8 yard Muslin Fabric (or 2 pieces of scrap big enough for pattern - I use scraps)
- • Fiberfill
- • Scrap - homespun fabric (nose)
- • DMC Thread - Black #310
- • 2- Buttons
- • Spanish moss
- • Jute or twine about 8 inches long
- • A slim stick from outside about 14 inches long (cut in 2 pieces: 3 inches and 11 inches)
Tools
- Sewing Machine
- Hot Glue Gun
- Sewing Needle with Large Eye
Instructions
- Sew together the 2 heads pieces leaving the TOP area open and the bottom; I use my White Sewing Machine for this. Turn pumpkin head out so seam is inside
- In a small bowl, mix 2 tablespoons instant coffee to 1/4 cup water - heat in the microwave.
- Wet muslin pieces with water, BEFORE putting into coffee solution, this will help them to absorb coffee more evenly. Let soak for 5-7 minutes in hot coffee mixture, remove and lay eyes flat to dry
- Add 5-6 drops of orange Folk Art paint to coffee - stir well; Place head back into coffee/orange solution - let sit for 5-7 min, remove and lay flat to dry
- Let dry over night OR place on a cookie sheet the oven on 150 degrees and dry. (Either way)
After Fabric is Dry
- Using fiberfill, stuff head to the fullness you like. Place long stick in the bottom and tie a loose knot just to hold it in place. This will help you to place the eyes, nose and mouth correctly.
- Thread 3 pieces of DMC thread into a large eye needle (I use a #18-22 with a sharp point). Place eyes on head in the place you would like them. Randomly stitch, large stitches, around each eye to hold in place. (Tip - if you don't want the knot to show, start "under" your eye piece and bring thread out -this will place knot under the eye not to be seen)
- Place nose where you would like and stitch randomly around it as well, securing it into place.
- Using long random stitches, stitch the mouth on using the same DMC thread.
- Lastly for the face, sew on the buttons and you will see what expression your fall primitive pumpkin has!
Attaching Stem
- Insert short 3 inch stick into the open space in the top head center. Using a hot glue gun, glue in place. Take just a bit of Spanish moss and glue in place around the stick (this will hide glue)
- Secure long stick in bottom of head and tie jute knot tighter "Wa-La - it's done!" Your fall primitive pumpkin is ready to be put into a fall arrangement of your choice to be enjoyed.
Notes
The length of the stick can vary. It will depend on where you plan to display it. I use all varying lengths. Feel free to play around to see what you like.
Connect with Hidden Springs Homestead!
Be sure to follow me on social media so you never miss a post!

Dianne Hadorn is the owner of Hidden Springs Homestead, nestled in the hills of East Tennessee. A Master Gardener and lifelong homesteader, she teaches families how to grow real food, preserve it with confidence, and depend less on the grocery store. Through her practical, down-to-earth approach, Dianne has become a trusted source for beginners who want to build a sustainable lifestyle and fill their pantries with food they’ve grown themselves.
I subscribed but didn’t get the pattern for the stick pumpkin. Could you please send it? Thanks!
Hi Barb,
sent to your email from d_hadorn@hotmail.com (website email is not working correctly at the moment)
Love these so much! Can’t wait to make a few! Thank You So Much!
I subscribed but I never got a email for the pattern. Have looked in junk folder and nothing. How can I get the pattern? These are so cute! Can’t wait to make them!
Hi Barb,
I just sent this to your email. Coming from Dianne@hshomestead.com Sorry you had trouble with it
Hello! Happy early fall! I would like to replicate the black look fabric. Do you start off with black fabric or is it the same for the orange just switching orange for black paint on the regular muslin fabric. I want to make your primitive pumpkins but also make some bats and crows.
Thanks! I love your pumpkins!
Hi Gretchen,
I LOVE FALL!! Glad you are looking. I used the same fabric and switched paints. I have bats and crow patterns, but I just haven’t gotten them put on the site yet. We are in the middle of a massive renovation and just not enough time to get them on yet.
Love these! They are so darling!!! Can’t wait to make them, thanks for the tutorial!
Thank you so much, very sweet. I’m so glad you like them!
hi my name is Lorraine , i came upon your site while on pinterest and saw that you can send a free pattern for your pumpkin on a stick. i was very interested. i sent my email address and did not receive anything. thank you i hope it is still available
Hi Lorraine,
Yes it is still available. Go to this Pumpkin Post and get find the free download. Once you put in your email address, I’ll send you a confirmation to make sure we have the address correct. It’s possible it went to your spam box. Confirm your email and “whitelist” me so my emails get to your inbox and the pattern will come after confirmation. Fall season is approaching, and I’m in the process for adding more patterns. So be sure to subscribe and I’ll send them right to your inbox.
The pattern should come immediately, if not, reach back out and I’ll make sure you get it.
Thanks for letting me know this,
Dianne
Sorry I didn’t get the email.
I’m not very craftsy, but this is so cute! I also love primitive decorations. My oldest daughter is very into sewing projects, so this might be something we try together. Thank you for sharing!
This is really cool. Reminds me a bit of the scarecrow from the Wizard of Oz 😃 what a great way to reuse some scrap fabric for Halloween!
Thank you Amy! I love using scraps. No waste is perfect! I’m glad you like them.
I love your Halloween pumpkin ideas, just don’t have the sewing machine. I try to make it without, do you think it’s possible? They all just look gorgeous! Thank.
Hi Mervova,
Thank you! And honestly you don’t have to have a sewing machine! It is totally possible without one. All you need to do is cut your 2 pieces for the head, pin them together and hand-stitch a simple straight stitch where the dotted line is. Just remember to leave the top open so you can put his stem in. You’ll do great I’m sure! Let me know if you run into any questions.
Happy Sewing! Dianne