
Hidden Springs Homestead may earn a commission for purchases made after clicking links on this page. Learn More.
One of the easiest foods to ferment is homemade sauerkraut. It uses only 2 ingredients, if you can believe that – salt and cabbage. Yep that’s it. Making your own homemade sauerkraut is just that simple.
It might take a couple practice runs, but you’ll have the “knack” for it in no time .
And, a good thing is – it doesn’t cost a lot to make sauerkraut either. The supplies you need for making old fashioned homemade sauerkraut is as easy as the recipe.
Benefits of sauerkraut
Just in case you don’t know. Homemade sauerkraut is very healthy for you and full of probiotic benefits. But it has to be raw.
Cooking and canning kills the good bacteria and probiotics. And the store bought stuff just does not have healthy benefits either. Raw and homemade – is best way to eat it.
Fermentation containers for making sauerkraut
You can do it the real simple way like I do by using simple Mason Jars but of course, their is a lot of products on the market too. Fermentation containers such as 1 gallon crocks , or fermenting gallon jugs.

Like I said, the recipe I use is the easiest sauerkraut recipe made and I use a Mason Jar. I have many of them readily available, since I do a lot of canning, and for me, they are perfect. Of course, if you have access to a 1 gallon crock or even a 5 gallon crock – use it!
Growing up, my mama used a 5 gallon crock to make her sauerkraut in. It was outside in the root cellar, and I remember that fermenting smell like it was just yesterday.
Can you ferment sauerkraut too long?
There is really no set fermentation time for fermenting vegetables. The number one factor that affects timing of making sauerkraut is temperature. The temperature of the area where the fermenting is taking place.
If the room temperature is cool – fermentation will be slow. If it is too warm – fermentation will be faster. So for example….
In summer months, the kitchen or closet will be warmer than it is in the winter. So a typical ferment that should take about 5 days could take 3-4 days.
But on the other hand, in the winter, the kitchen or closet may be cooler and therefore the same typical 5 day ferment may take 7-9 days. The ideal temperature of fermenting sauerkraut or any fermented vegetable or drinks is 65-75° F.
This is why if you have a basement or a root cellar – they are perfect for fermenting. I use my “well pump house.”
We get our water from a well, and the small enclosure that holds the pump and tank has a concrete floor and top and the walls are cinder blocks poured with concrete.
It is above ground but it stays a comfortable 65° in most all the time in the summer and in the winter, it stays around 50°F which works great.
Do you need to sterilize jars for making sauerkraut?
No, sterilizing jars for fermenting is not necessary. They do need to be really clean.
And it is necessary though to keep the raw cabbage well submerged under the salt brine. The brine will not allow any bacteria to grow.
A great book for learning more about fermenting is Fermented Vegetables by Kirsten and Christopher Shockey or you can refer to The National Center For Home Food Preservation in the fermenting section.
What kind of water do i use to make sauerkraut?
The best water for fermenting vegetables is non-chlorinated water. The reason you need to use non-chlorinated is because the added chlorine, fluorides and other chemicals will react with the salt and not allow it to ferment properly.
Good or bad bacteria cannot grow in chlorine.
To decide what water is best, take a look at this great article – Choosing a Water Source for Making Culture and Fermented Foods.
How to make sauerkraut | Easy and Homemade
Ingredients
I make sauerkraut in larger quantities. So you prefer to make only a small batch, you can expect one regular size head of cabbage to make 1 quart of raw fermented sauerkraut.
For 1 quart –
- 1 Fresh head of Green Cabbage
- 1 Tablespoon of Canning Salt (don’t use iodine salt or sea salt)
For 8 Quarts or 16 Pints (My Recipe)
- 8 Heads of Fresh Cabbage
- 8 Tablespoons of Canning Salt
- If need a Brine – will need 1 tablespoon of Canning Salt per 4 cups of water)
Don’t be afraid to make larger batches. As simple as making sauerkraut is, it only adds a few more minutes to the process.
The even better part is the longer it ferments, the better it tastes. So, if you have several jars made, the taste will just continue to get better and better.
Supplies
- Large Glass Bowl or can be “food grade” plastic (I use this one)
- Cutting Board
- Large Sharp Knife
- Small Wooden Spoon (for packing cabbage in jars)
- Mason Jars ( can be wide mouth or regular) – I use both
- Plastic Storage Lids (to allow for natural burping)
Instructions
RELATED: Use “The Complete Beginners Guide To Home Canning” and get comfortable with home canning.
The more fresh your cabbages, the better your kraut will taste. I harvest my cabbages the day I plan to make my sauerkraut. If you are not able to make it the day of your harvest or purchase, be sure to store them in the refrigerator.
Use it within 2 days maximum after it is harvested. Or it becomes soft and does not make a good old fashioned sauerkraut.
Prepping Cabbage
Pull rough outer leaves off and thoroughly rinse cabbage under cold running water. Allow cabbage heads to drain well for 5-7 minutes.
Save rough outer leaves for using later.
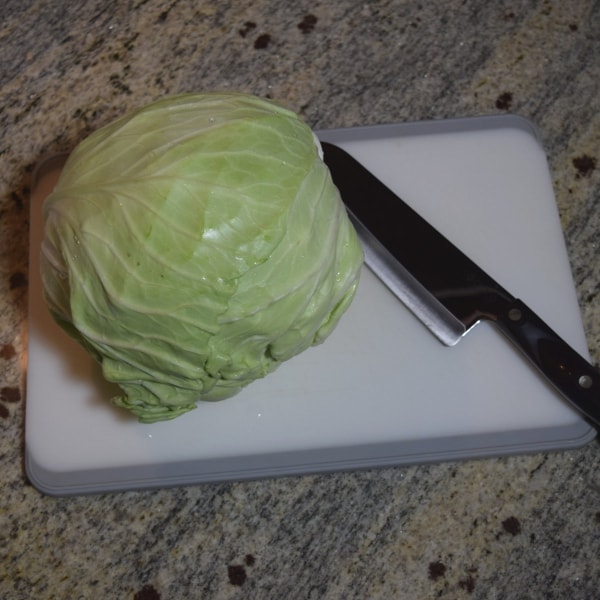
Lay one head of cabbage out on cutting board and using large knife, quarter cabbage into wedges and remove hard white core. Don’t throw out the core, set it aside – we will be using it.
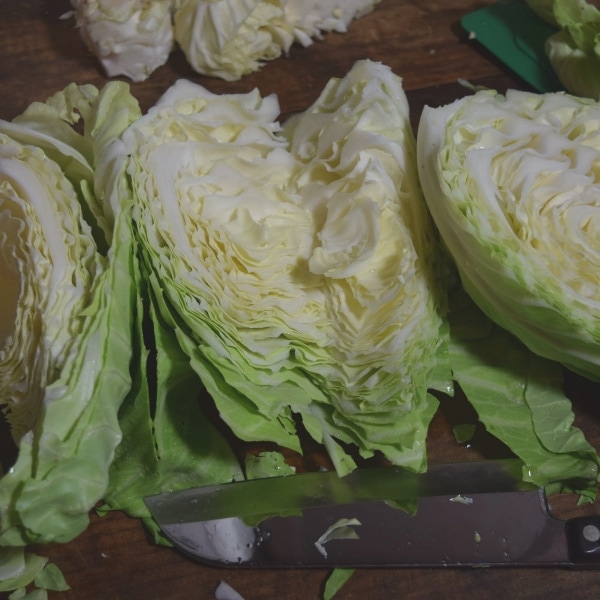
Thinly slice quarters, length wise, into slim – thin strips. Mine are normally about 1/4″ wide. Do your best to make them uniform if possible.
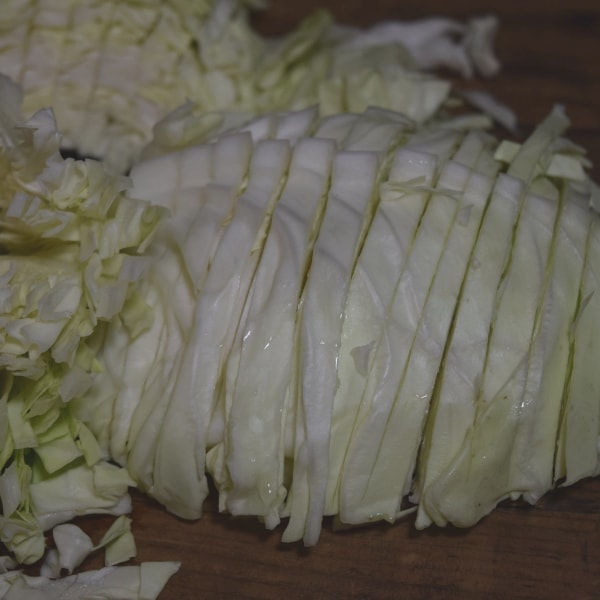
Don’t over think it though, they don’t have to be perfect!
Adding Canning Salt
When you have the whole head chopped, place it into a large glass bowl and sprinkle it with 1 tablespoon of canning salt. Mix it well and then allow to sit for 15 minutes.
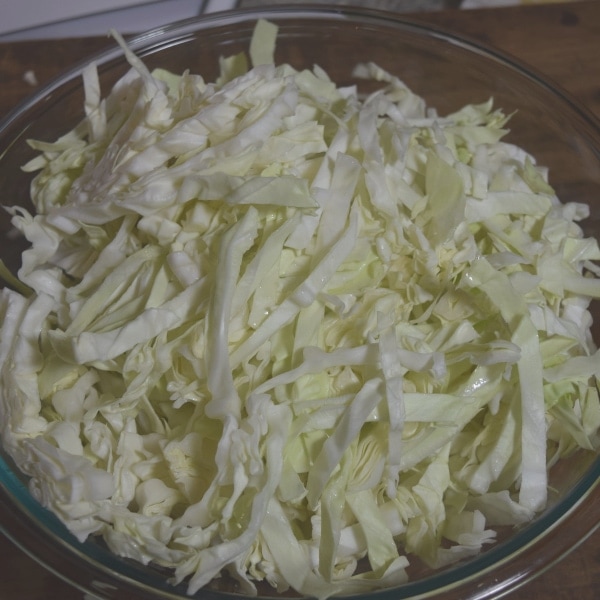
In the meantime, be cutting up your next cabbage head.
Smashing or Working Cabbage to Get Juices flowing
This is the fun part. After the 15 minutes is up – the idea of smashing the cabbage is to the juices pouring out.
Both cabbage and lettuce are made of mostly water, so the salt reacts and causes the cabbage to go “limp” which forces the juices to flow. Hopefully, you will end up with a lot of cabbage juice in the bottom the bowl.
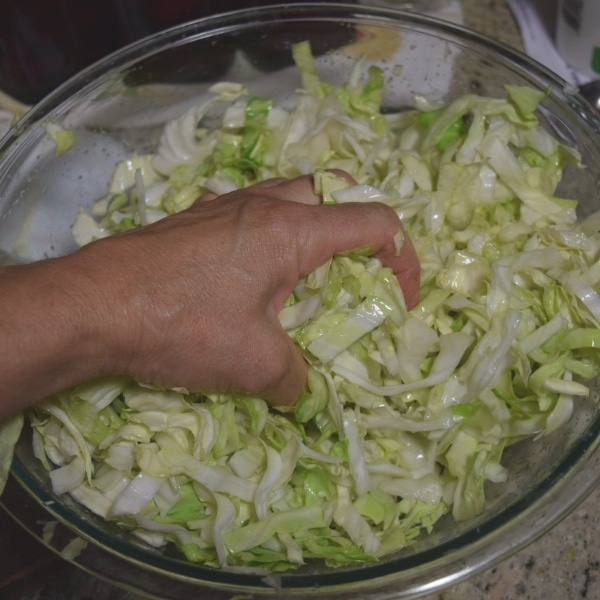
I use my hands for smashing, if you are not comfortable doing this, feel free to use a clean meat mallet or whatever blunt object you have on hand. Just something you can use for pounding and kneading the cabbage to get all the juices out.
Of course with all canning recipes, there are specialty items you can purchase like this cabbage stamper. I don’t have one, but sure would be willing to give it a try if I did. My hands work great though.
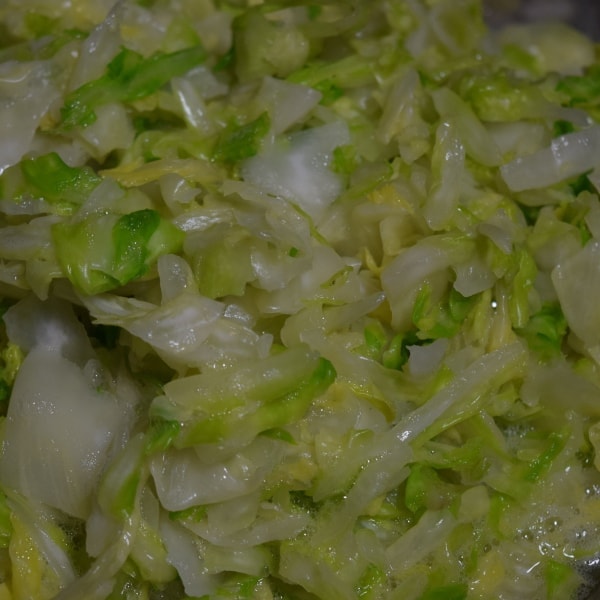
Keep squeezing or beating for 7-10 minutes. I honestly don’t set a timer, but it is about this long. When the cabbage looks all well smashed and juicy – I’m done.
Packing Sauerkraut into Mason Jars
With a clean Mason Jar in hand, reach and take a large fist full of stomped cabbage and put it into your jar. Use the wooden spoon to pack it down. The goal is to remove as many air bubbles as possible.
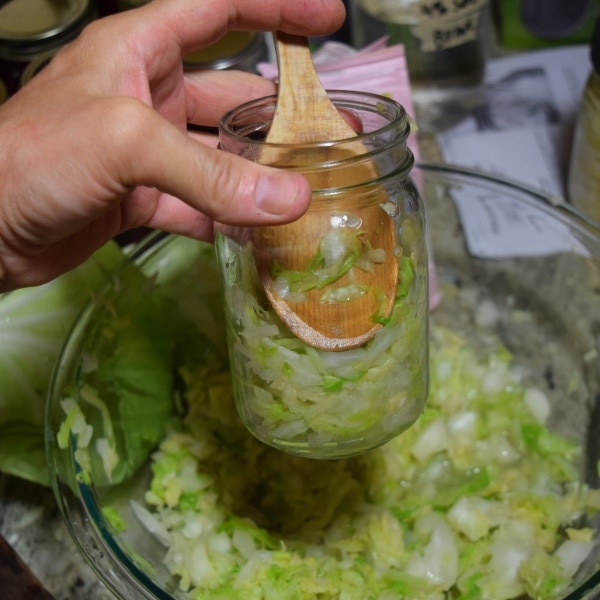
Grasp another handful of cabbage and put into the jar – pack it down TIGHT as you can get it, again removing air bubbles.
Continue to pack cabbage into jar and leave a 1 inch headspace. At this point, I use my fingers and press down just to make sure it is tightly packed.
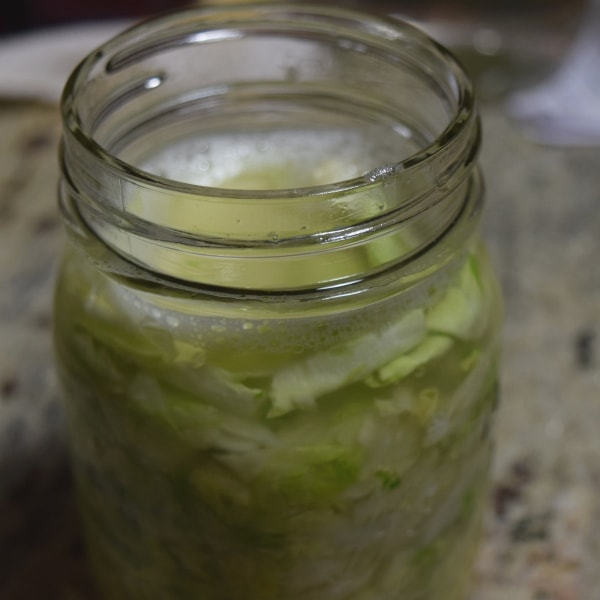
Adding 2% Salt Brine to jars
Now that your jar is packed, move onto the next one until you have only the wonderful salt brine left in the bottom of the bowl.
Since I use pint Mason jars, I normally get 2 well-packed jars per cabbage head.
Carefully, lift your bowl of juice and pour salt brine into jar completely covering cabbage. Hopefully, you end up with enough. Give it a little push with your fingers just to remove any last minute air bubbles.
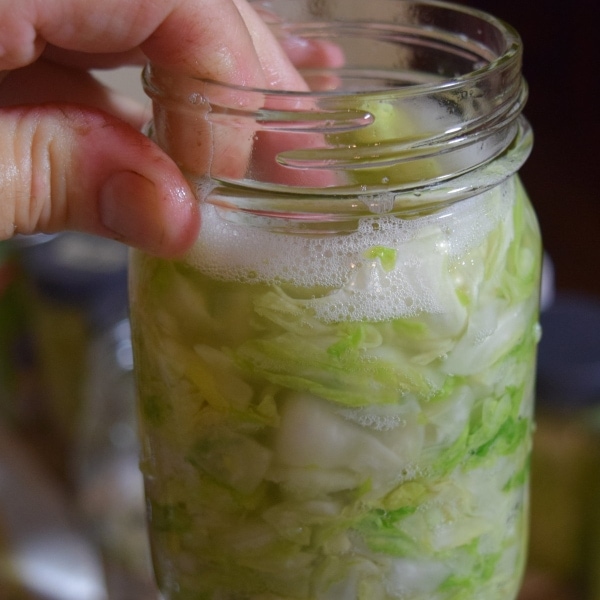
Cabbage has to be completely covered or it will mold. And stink really badly!
How to make a 2% Salt brine
If you don’t have enough salt brine to completely cover cabbage – you can easily make a 2% salt brine to finish the job. Here’s how:
Dissolve 1 tablespoon of canning salt in 4 cups of “non-chlorinated” water. Pour it over the cabbage making sure it is completely covered.
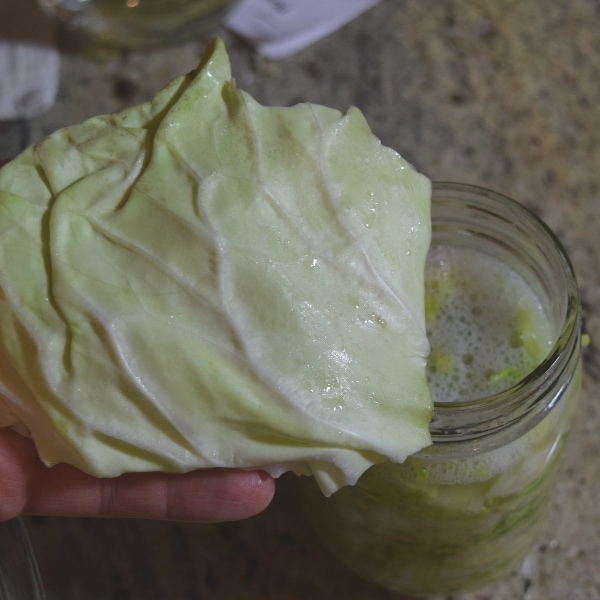
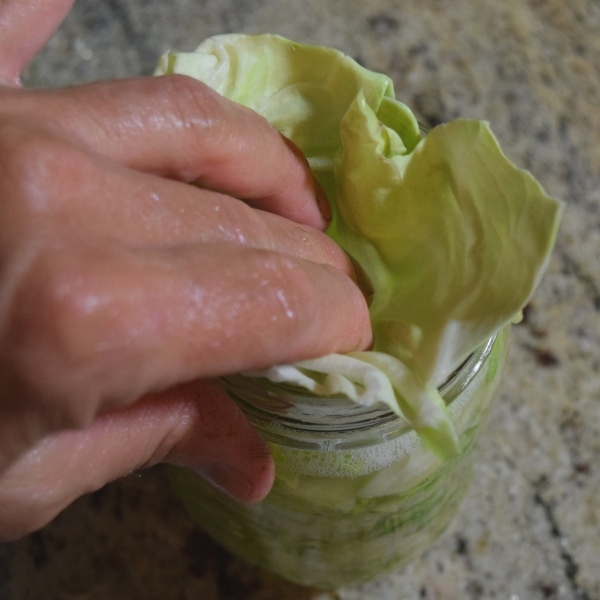
cabbage leaf to cover cabbage
Remember those cabbage leaves I ask you to save? Well, now it the time to use them. Tear one just a bit larger than the opening of your jar.
Now here’s the frugal way of canning homemade sauerkraut….
Stuff the cabbage leaf down into the jar, covering the cabbage and “tucking” the edges down and around the shredded cabbage. Cover it completely. Remember, everything has to be covered to prevent mold.
Of course, if you prefer, you can purchase glass weights that will hold the cabbage down as well.
These are great, but I don’t own any at this time. My friend uses them and I’ve tried hers – they work FABULOUS! I’ve added them to my Amazon wish list.
Using Cabbage core to hold cabbage down
This might be a little overkill, but remember the hard core we saved? Now, take it and cut to fit inside the jar. Make it just a “tad” too long.

Stuff the core in the jar and place the plastic lid and adjust to finger-tight.

Setting Jars aside to Ferment
Now you can simply store the jars where you will leave them for at least 2 weeks. A lot of people just store it on the counter in the kitchen, at room temperature, and says it does well.
As I said, I store mine outside in the pump house. It can of course be kept in a closet or some place like this as well.
If you have a basement or root cellar – even better. Remember the ideal temperature for fermenting sauerkraut is 65-75°F.
My friend ferments hers in the spare bedroom closet. Oh and a note – place either a dish or cookie sheet under your jars of kraut. The fermenting process will bubble during processing juices need to leak out the lids.
So when you question should my sauerkraut be bubbling? Yes, this is perfectly normal. It is part of the fermentation process.
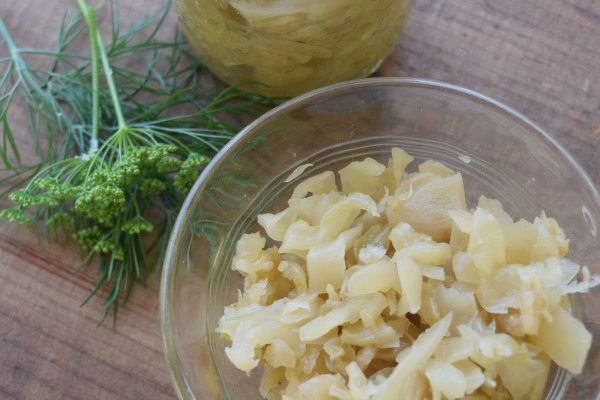
And after it has fermented for a week, smell and taste it. If it is to your liking, it is ready to be stored in the refrigerator. If not, just close it back up and let it continue to ferment.
The longer it ferments, the more tangy it becomes. I normally leave mine for about a month. My mama, on the other hand, used to leave hers for about 2 months.
Homemade sauerkraut can be ready to eat within a couple weeks. It totally depends on your preference of the flavor.
So do you feel more comfortable making your own homemade sauerkraut now? I hope so… It may look like lot of steps, but really, it easy to make it.
Tell me if you already make homemade sauerkraut or do you feel confident enough now to try it on your own? I’d love to hear from you…
How To Make Sauerkraut | Easy And Homemade
Easy to make homemade sauerkraut. You can make your own healthy fermented sauerkraut with this easy step by step recipe that is full of instructional photos.
Ingredients
- 1 Regular Size Cabbage Head
- 1 TBSP Canning Salt
- Clean Mason Jar
- For Brine: 4 cups water and 1 additional TBSP Canning Salt
Instructions
- Remove rough outer leaves and set them aside for later
- Wash cabbage head under cold running water and drain
- Quarter cabbage into wedges and remove hard core (set core aside for later)
- Thinly slice wedges, length wise, into 1/4" stripes. (These don't have to be perfect)
- Put chopped cabbage into large bowl and sprinkle with 1 TBSP Canning Salt - Mix well
- Let salted cabbage sit for 15 minutes
- Next start mashing /crushing cabbage to force juices to flow out of it. It will become very limp and change color. Do this for about 7 minutes
- Now take clean jar and firmly pack mashed cabbage in to remove as many air bubbles as possible
- Continue to pack jar leaving a 1" headspace.
- Once all mashed cabbage is out of bowl, gently pour salt brine into jar completely covering cabbage
- TO MAKE A 2% SALT BRINE:
- If you didn't have enough salt brine to completely cover cabbage you will need to make one -
- In a bowl, dissolve 1 TBSP Canning Salt in 4 Cups non-chlorinated water
- Pour brine to finish filling jar
- Now tear a piece of cabbage leaf a bit larger than opening of jar
- Stuff it down and tuck under edges to completely submerge cabbage. (If left exposed, it will need to be thrown out
- Now cut a cabbage stalk a bit longer than 1 inch and place it on top of the leaf
- Wipe rim clean and put on plastic lid - fingertight only
- (Lid will press down on stalk. Anything exposed will need to be thrown out after fermentation process is done)
- Store jars where they can sit for 1 week. You will want to put a dish under them to catch the juices as it bubbles out
- After 1 week, smell and taste sauerkraut. If it tastes good - it's done. If not, submerge it back under brine, put lid back on and check again in a few days.
- The longer it ferments, the better it tastes.
Notes
Any cabbage that is not completely submerged by salt brine will need to go into the compost
Nutrition Information:
Yield:
6Serving Size:
1Amount Per Serving: Calories: 48Total Fat: 0gSaturated Fat: 0gTrans Fat: 0gUnsaturated Fat: 0gCholesterol: 0mgSodium: 2349mgCarbohydrates: 12gFiber: 4gSugar: 6gProtein: 3g
And now that you see it’s so easy to make your own homemade sauerkraut, here’s ya 21 easy and delicious recipes that use sauerkraut.
More Canning Tips To Enjoy:
- How to Can Whole Tomatoes
- How to Make Homemade Pizza Sauce
- Easy and Delicious Spaghetti Sauce
- Canning Green Beans
- How to Grow Lettuce from Seed at Home


Connect with Hidden Springs Homestead!
Be sure to follow me on social media so you never miss a post!

Dianne Hadorn is the owner of Hidden Springs Homestead nestled in the hills of East Tennessee. She is a Master Gardener and enjoys helping others learn how to grow and preserve their own food and sharing tips for living a more self-sufficient lifestyle.
Hi Diane, this looks very do-able! I like Wayne’s tips too. It’s getting to be cabbage season here and I look forward to trying my first batch of sauerkraut! Jan in MA
My grandma’s saurkraut was always in a quart sealer with a glass lid with rubber ring. She’d just have them on the p try shelves with the pickles. Is it supposed to be refrigerated after fermentation??
Hi Lauren,
Yes, sauerkraut can be water bath canned and kept on the shelf. My mom used to make hers the same way. This recipe is for fermented sauerkraut only and not shelf stable without being properly canned.
A tip on making sauerkraut: Allow your cabbage to achieve room temperature for a couple of days before you cut it. This will strengthen the natural bacteria before you start the colonies in the crocks or jars.
Tip #2: Save some of the brine from each batch to culture the next batch and you can develop a flavor that can be continued sort of like using the mother when making apple cider vinegar.
I like your site.
Wayne
From Sevier county, Tennessee
Thanks Wayne for the tips. Sauerkraut is one of my favorites. Glad you visited be sure to signup for the newsletter. I do my best to share weekly.